
Same Day Sourdough Boule
High Altitude Sourdough is a participant in the Amazon Services LLC Associates Program. As an Amazon Associate, I earn from qualifying purchases. If you buy something through my links, I might make a small commission—at no extra cost to you.
Look, I get it. Sometimes you wake up on a Saturday morning and think, “I want fresh sourdough bread today.” Not tomorrow after an overnight cold ferment. Not next week. Today.
Is overnight fermentation better? Absolutely. The cold retard develops deeper flavor, gives you more flexibility with timing, and honestly makes the whole process more forgiving—especially at 7,000 feet where everything ferments faster than you’d expect. But here’s the thing: same-day sourdough is completely doable at high altitude, and it’s a great way to get your feet wet if you’re new to this or just want to see results fast.
This recipe is designed specifically for baking at elevation. The 72% hydration is dialed in for our thinner air, the timing accounts for faster fermentation, and the technique is straightforward enough that you won’t be second-guessing yourself at every step.
Getting Started · The Setup

Before you begin, make sure your starter is actually ready. I’m talking doubled in size 4-6 hours after feeding, loaded with bubbles, and smelling pleasant—kind of like yogurt, not like nail polish remover. Your bread is only as good as your starter, so don’t skip this part.
You’ll also want to have your mise en place ready: KitchenAid with dough hook, a clear container for bulk fermentation (so you can see what’s happening), a bench scraper, a banneton or bowl lined with a floured towel, and your baking setup. At altitude, things move fast, so being organized matters.
The Mix · All In One Go

Here’s where this recipe differs from a lot of traditional sourdough methods. We’re skipping the autolyse. Why? Because when you’re using an active starter, you already have enzymes working from the moment the starter hits the flour. At altitude with a same-day timeline, that extra step just isn’t necessary.
Place your KitchenAid bowl on the scale and add everything in order: 255g water at 80-85°F (warm enough to help fermentation but not so hot it kills anything), 140g of your bubbly starter, 190g AP flour, 190g bread flour, and 9g salt. Mix on speed 2 for about 3 minutes until the dough is smooth and pulling away from the sides. You’re aiming for a final dough temperature of 75-78°F.
Bulk Fermentation · Watch the Dough, Not the Clock
This is where high-altitude baking gets interesting. Your bulk fermentation will take 3-4 hours, but that’s a guideline, not a rule. At 7,000 feet, lower air pressure means faster fermentation, so you need to rely on visual cues.
Leave the dough in the bowl, cover it with a bread bag or damp towel, and perform a series of folds every 45-60 minutes. You’re looking for 2-3 sets total. To fold: wet your hands, grab one side of the dough, stretch it up, and fold it over itself. Rotate the bowl and repeat 3-4 times.
What you’re watching for: the dough should increase by about 30-40% in volume, develop a light and airy texture (think fluffy marshmallow), show a domed top that’s pulling away from the sides of the bowl, and move as one cohesive mass when you shake the container. When you pull the dough away from the sides, it should come away relatively cleanly without long strands sticking everywhere.
Shaping · Building Structure

Turn your dough out onto a lightly floured surface. First, pre-shape it into a round. Let this sit covered for 20 minutes. This rest period lets the gluten relax, making the dough easier to shape, and forms a light skin on the surface that prevents sticking during final shaping.
After the bench rest, shape your dough into a boule. Work confidently but don’t overhandle it—you want to build surface tension without tearing the dough or degassing it completely. Place it seam-side up in a well-floured banneton.
Final Proof · The Home Stretch

Cover your shaped dough with a 9 inch round banneton and let it proof at room temperature for 2-3 hours. You’re looking for a 70-80% rise. The poke test is your friend here: gently press your finger into the dough about half an inch deep. If it springs back slowly and leaves a slight indentation, you’re ready to bake. If it springs back immediately, give it more time. If it doesn’t spring back at all, you’ve over-proofed (it happens—bake it anyway and learn for next time).
Baking · Heat and Steam

An hour before you’re ready to bake, preheat your oven to 475°F with your baking steel on the middle rack. When it’s time, dust your loaf with rice flour and invert it onto a peel or piece of parchment.
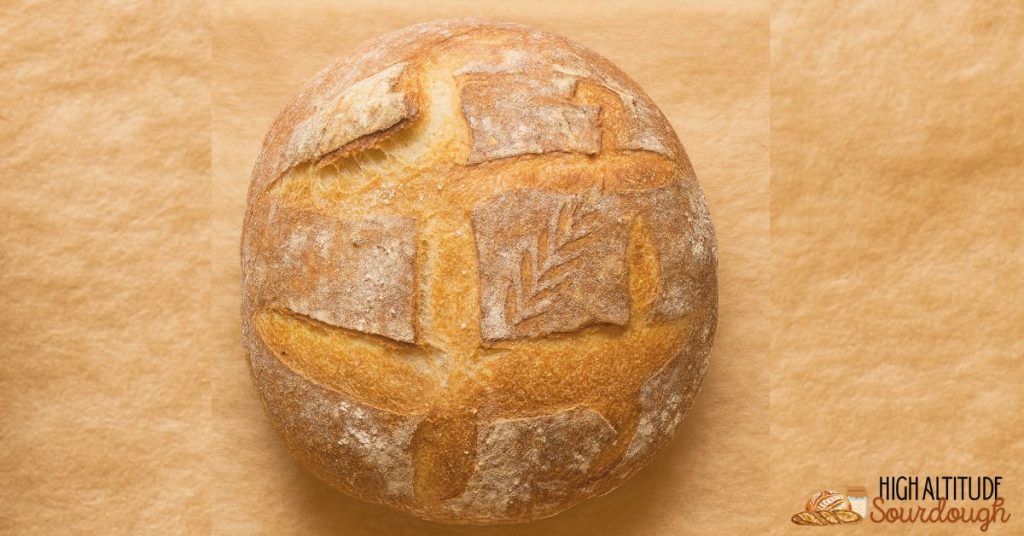
Now for scoring, keep it simple. Make a little tic tac toe design, about half an inch deep. Work quickly—you don’t want your dough sitting out deflating while you try to create some elaborate design. Speed matters here.
Slide your loaf onto the preheated steel, and immediately drop the temperature from 475°F to 450°F, and spray the loaf and oven walls with water 3-4 times. Close the door fast to trap that steam.

Bake at 450°F for 20 minutes, rotate the loaf, then continue for another 15-20 minutes. You’re looking for a deep mahogany crust and an internal temperature of 200-205°F.
The Reveal
Let your bread cool on a rack for at least an hour. I know it’s tempting to cut into it immediately, but the crumb is still setting and you’ll end up with a gummy mess if you don’t wait.

When you finally slice into it, you should see an open, airy crumb with a mix of small and medium holes—nothing too crazy, but definitely proof that fermentation happened and gluten structure was built properly.
Final Thoughts
Is this the absolute best sourdough you’ll ever make? Probably not. That overnight fermented loaf with its complex flavor and perfect texture will always win on taste. But same-day sourdough at altitude is totally viable, and it’s an excellent way to build your skills, understand how dough behaves at elevation, and get immediate gratification.
Once you’ve nailed this recipe a few times, I’d encourage you to try the overnight version. But for now, enjoy the fact that you can start a loaf after breakfast and have fresh bread by dinner. At 7,000 feet, that’s pretty cool.

Same Day Sourdough Boule
Ingredients
Equipment
Method
- Place KitchenAid bowl on scale and tare. Add ingredients in order: 255g water (80-85°F), 140g active starter, 190g AP flour, 190g bread flour, and 9g salt.
- Mix on speed 2 with dough hook for 3 minutes and then increase speed to speed 4 for another 2 minutes until dough is smooth and pulls away from sides of bowl. Target final dough temperature: 75-78°F.
- Transfer dough to clear container. Cover with damp towel.
- Perform stretch and folds every 45-60 minutes (2-3 sets total). To fold: wet hands, grab one side of dough, stretch up and fold over. Rotate bowl, repeat 3-4 times.
- Bulk fermentation is complete when dough has increased 30-40% in volume, shows a domed top, moves as one mass when shaken, and pulls cleanly from container sides. This takes 3-4 hours at 7,000 feet.
- Turn dough onto lightly floured surface. Using bench scraper, push down and around to form a tight round.
- Let rest uncovered for 20 minutes. This lets the gluten relax and forms a light skin that prevents sticking during final shaping.
- Shape dough into a boule, building surface tension without overhandling or tearing.
- Place seam-side up in well-floured banneton. Cover with clean kitchen towel.
- Proof at room temperature for 2-3 hours until dough has risen 70-80%.
- Perform poke test: press finger ½ inch deep into dough. If it springs back slowly leaving slight indentation, it’s ready to bake.
- One hour before baking, preheat oven to 475°F with baking steel on middle rack.
- Dust loaf with rice flour and invert onto peel or parchment.
- Score one clean expansion line from top to bottom at 45-degree angle, about ½ inch deep. Work quickly.
- Slide loaf onto preheated steel. Immediately reduce oven to 450°F. Spray loaf and oven walls with water 3-4 times. Close door quickly.
- Bake at 450°F for 20 minutes, then rotate.
- Continue baking 15-20 minutes more until deep mahogany crust forms and internal temperature reaches 200-205°F.
- Transfer to cooling rack. Let cool at least 1 hour before slicing.
Video
Notes
- Dough ferments faster at 7,000 feet—watch the dough, not the clock
- Use 80-85°F water to achieve target dough temperature of 75-78°F (warmer water in winter months)
- You may need slightly more water (bump to 260-265g) if dough feels stiff
- Doubled in size 4-6 hours after feeding
- Lots of bubbles throughout
- Pleasant smell (slightly yeasty, like yogurt—not sour or acidic)
- Thick consistency (not runny)
